Handy Tips For Using Math Anchor Charts in the Classroom
This has been a busy month for math in my classroom! In this blog post, I want to share a favorite learning tool that can be used for any subject, but is expecially helpful for math – anchor charts.
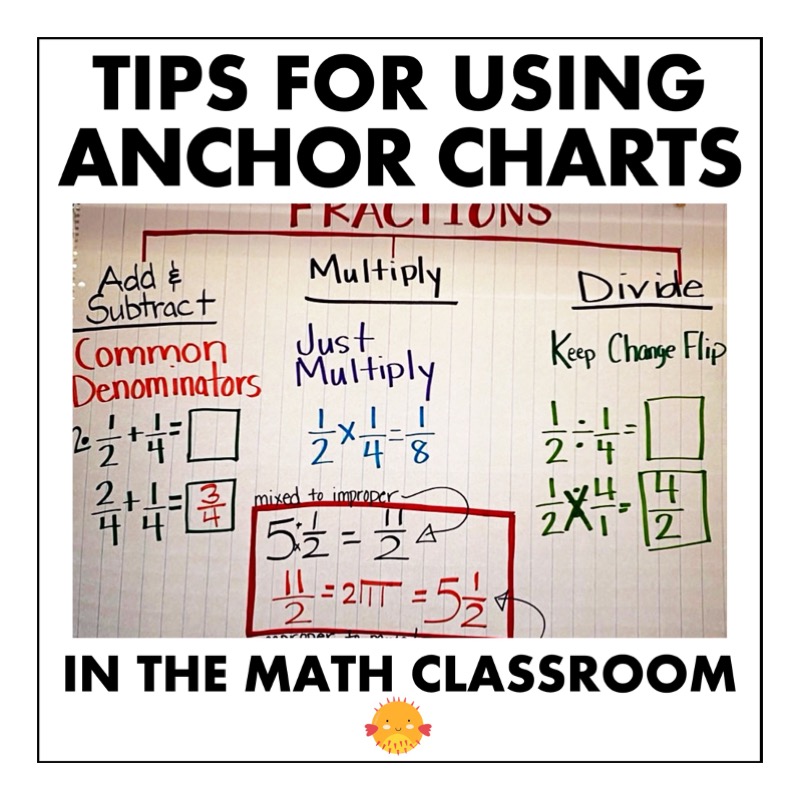
We’ve been making and using anchor charts during our daily math workshop meeting. The kids help decide what to include and I do the writing on big chart paper. They are a great way to document student learning and serve as visual prompts that my students can refer to during their independent work.
.
Examples of Anchor Charts
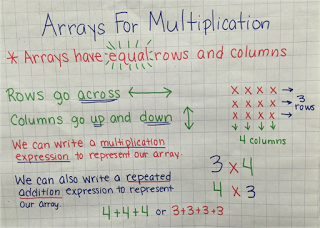
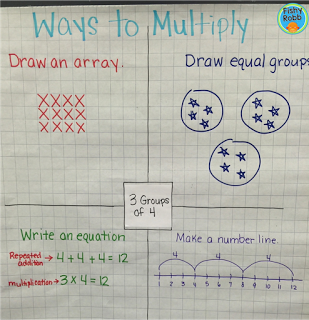
First, let’s look at some of the math anchor charts my students have helped create. In 3rd grade, we are working on multiplication right now. These anchor charts show the different ways they can model and solve multiplication problems – important information they need to be successful with our new learning.

.
I have found that one of the benefits of anchor charts is that they actually help with classroom management. They increase student engagement because students always have somewhere to look for help.
Another bonus – anchor charts are a great tool to display alongside your learning objective. They really help students SEE what the objective looks like.
After we make a big anchor chart together, the students copy it down in their math journals during math workshop. That way they have their very own anchor charts to use as a reference point even after they’ve been taken down from the walls. My students have been going a great job with this and really enjoy referring back to their journals when needed. Once they realized that I will occasionally let them use their journals during quizzes, their handwriting suddenly got a lot neater!
If you have kids that struggle with the writing process, an alternative is take pictures of your anchor charts and print them out to go in your student notebooks.
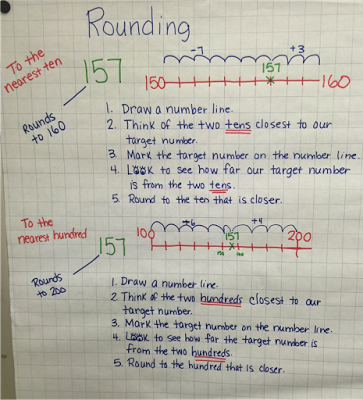
Here’s another chart we made for rounding numbers…
.
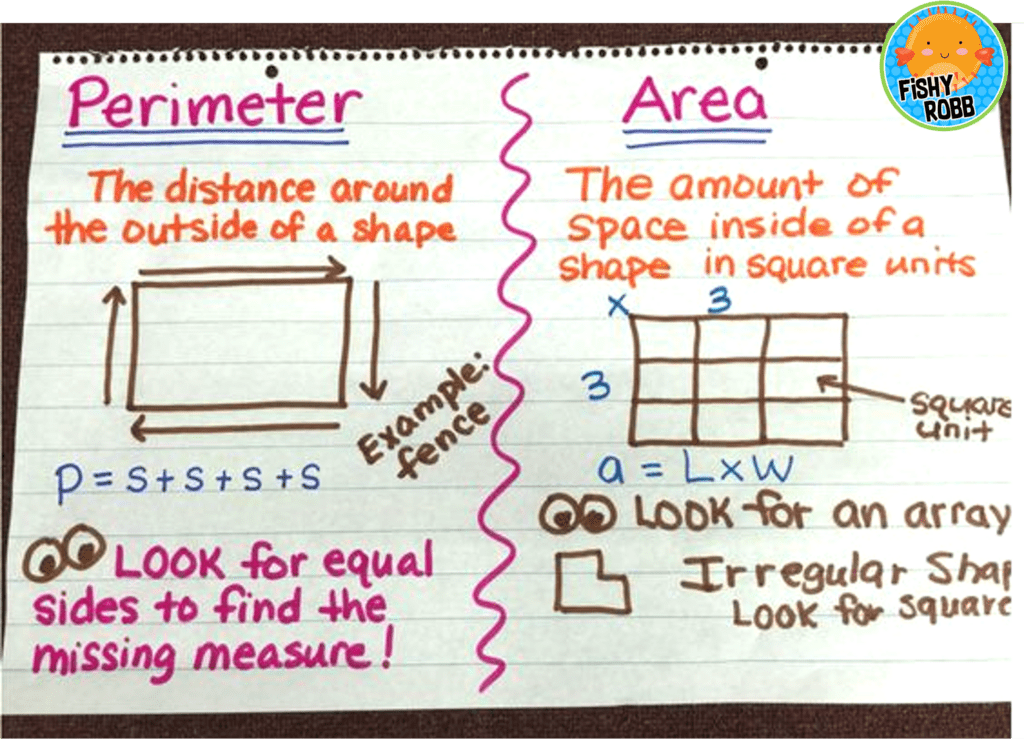
And another chart we made for area and perimeter:
.
These are just a few examples of the anchor charts I am using with my groups. They aren’t the fancy and perfectly drawn ones you see on Instagram, but they’re effective. I keep them hanging on one wall where the entire class can see them and the students can refer to them at any time. The important thing is that they contributed to the content themselves!
.
How to Make Effective Anchor Charts
When creating anchor charts, include only the most important information that will help students grasp the main ideas. Avoid overloading the chart with too much detail.
Highlight the core concepts, definitions, and processes that are central to the lesson. This helps keep your charts clear and focused.
Incorporate diagrams, symbols, or pictures that help clarify the concepts. Visuals can make abstract ideas more concrete.
Provide examples that are relevant to the current lesson or real-life scenarios that students can relate to.
Here are a few more tips to consider when creating anchor charts in your classroom:
- Use big chart paper so you have plenty of room to write.
- Use color! In fact, us different colors when writing to highlight main points and to keep students’ attention.
- Add simple pictures that are easy to understand.
- Hang them where they can easily be seen during independent practice.
- Use bullet points or numbered lists.
- Include the most important content – not every tiny detail.
- Add a large title the reflects the big idea (Each chart should have a clear purpose).
.
How to Store and Display Anchor Charts
Now, once you and your students have made a lot of anchor charts, how do you hang or store them? I’ve seen a lot of different methods to display charts… binder rings, magnetic towel bars, clothespins, tape, etc. But my favorite way is to use these Command Toggle Hooks.
Just stick a couple on the wall and you can hang quite a few charts on them. Super easy and you can switch them out with very little effort. The same hooks work equally well to store charts if you have some wall space in your closet.
Another option I really like is the clothing hangers with clips (like you use for hanging skirts or pants). My classroom has a small coat closet with a bar. I can hang quite a lot of clip hangers in there and each clip hanger can hold dozens of anchor charts. I just label each hanger with the subject areas and/or grade levels that they are for (since I teach multiple grades).
If you aren’t already using anchor charts, the good news is that you can start any time! They are an excellent way to document student learning and are one of the most valuable reference materials you can have in the classroom. And they aren’t just for math!
Here are some of the other topics I am currently using anchor charts for in my various intervention groups:
- Classroom procedures
- Character traits
- Parts of speech
- Parts of a map
- Letter of the week
- Goods and services
- Cause and effect
.
The possibilities are endless! So get out those markers and your chart paper and get started!
.
FAQ About Using Anchor Charts In the Classroom
.
How do you keep anchor charts relevant over time and prevent them from becoming stale or ignored?
Periodically review and update your anchor charts to ensure they reflect current learning objectives and student needs. It’s a great idea to actually ask students for feedback on which charts they find useful. Which ones do they actually USE when working independently? This helps keep the charts aligned with their needs. Switching out your anchor charts regularly will keep things fresh. When you leave the same ones up, in the same spot, all year long, they tend to become invisible over time. So move them around and swap them out to match what you’re teaching.
How do you ensure students use anchor charts once you’ve put them up?
Involve students in the creation and updating of anchor charts. This can include adding new examples, correcting errors, or illustrating concepts. When students contribute, they’re more likely to engage with and remember the content. Incorporate interactive elements such as flaps, movable sticky notes, or laminated sections that can be written on with dry-erase markers. Integrate your charts into classroom activities and discussions. When you model how to use them for students, they are more likely to use them on their own.
What are some common mistakes to avoid when creating anchor charts?
Some things to avoid when making anchor charts:
- too much detail
- complex language/long chunks of text
- disorganized or cluttered layout
- lack of visuals or confusing visuals
- too small writing
- not aligned to objectives


